In many cases it is necessary to mask pixels. In other words, this is to define a collection of pixels that will be ignored for further operations. A typical case is when using diffraction images, where the beam stopper and bad zones should be ignored in the azimuthal integration).
You need two steps
to define a ROI (Region Of Interest)
then mask ROI (or alternatively its complementary 1-ROI). The masking pixels are displayed in green. If the mask is not good, you can always Edit->Undo.
For selecting the ROI, you have some usual geometries (like cake).
It is suggested that you define first the ROI using the mouse, and you then refine the ROI using the ”ROI/Mask Manager...” option.
For masking, you can mask the last ROI defined, 1-ROI, or you can mask zeroes (useful for a first trial) or mask pixels whose intensity values are inside a defined interval (you may use first Calculation->Histogram to view the intensity histogram).
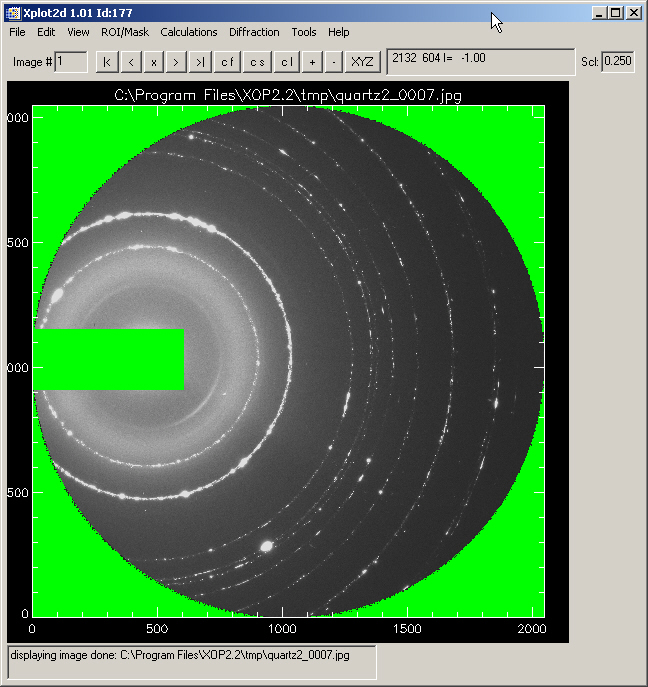
Use for example ROI/Mask> Rectangle to select a rectangle over the beam stopper shadow:
The ROI selections may be edited using the "ROI/Mask Manager". Open it and you will get a window like this one:
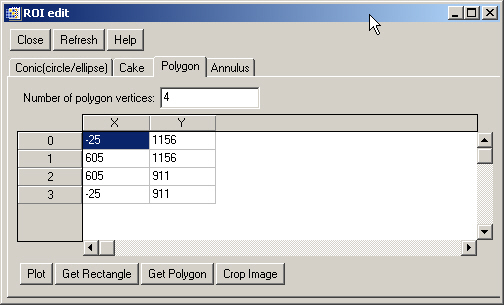
With these tools, you can edit the ROI limits, and replot them, among
other thinks. A particular feature of the rectangular (or polygonal) ROI
is that you can crop the image to this ROI and export the results. For
example, use the  button in the ROI/Mask Manager (or Xplot2D>ROI/Mask>Crop/Export
last polygon ROI), select "Result to: another
application" and enter the command "icontour,img". You
will get a new window with the contour curves of the rectangular ROI:
button in the ROI/Mask Manager (or Xplot2D>ROI/Mask>Crop/Export
last polygon ROI), select "Result to: another
application" and enter the command "icontour,img". You
will get a new window with the contour curves of the rectangular ROI:

Once you get the rectangular ROI which includes the beamstopper, you want to mask it. Select "ROI/Mask>Set mask as last ROI" and you will get your ROI displayed in Green. This means that these pixels are not used for further operations. Note that at this point you may "Edit>Undo last image modification" to come back to the original image. From the technical point of view, the values of the masked pixels are set to a negative value. By convention, a pixel with negative value means a masked pixel for Xplot2D.
You also may want to mask the pixels which are outside the working detector area (circular). These pixels are in the image with intensity equal to zero. Select "ROI/Mask>Mask pixels with zeroes". You will get an image like this one: